Handy Automator
Source codeWhat is it? Link to heading
Want to use a home automation system, but hate talking to AI? Say hello to the Handy Automator!
Let’s say you wanted to turn on your living room lights, simply lift up your hand and make the gesture which you configured for that automation. Let’s say that the gesture is a peace sign, our system will biometrically authenticate you, figure out what you mean by that hand gesture, and trigger the corresponding automation. All within a couple of seconds.
Now, I must admit, I didn’t actually work on the face and gesture recognition part of the project myself. That credit goes to my friends who are also working on this alongside me. Instead I worked on the API server that the computer-vision part of the system calls upon. This API server, which I took to calling the “Decision Maker” module or DM for short, was written entirely in Go.

How Does It Work? Link to heading
The Handy Automator is composed of many different components and moving parts.
Edge Devices Link to heading
It makes no sense to have an automation system that has no devices to automate. For the purposes of demonstration and proof of concept, we just used Wi-Fi capable Arduinos and hooked them up to some LED lights.
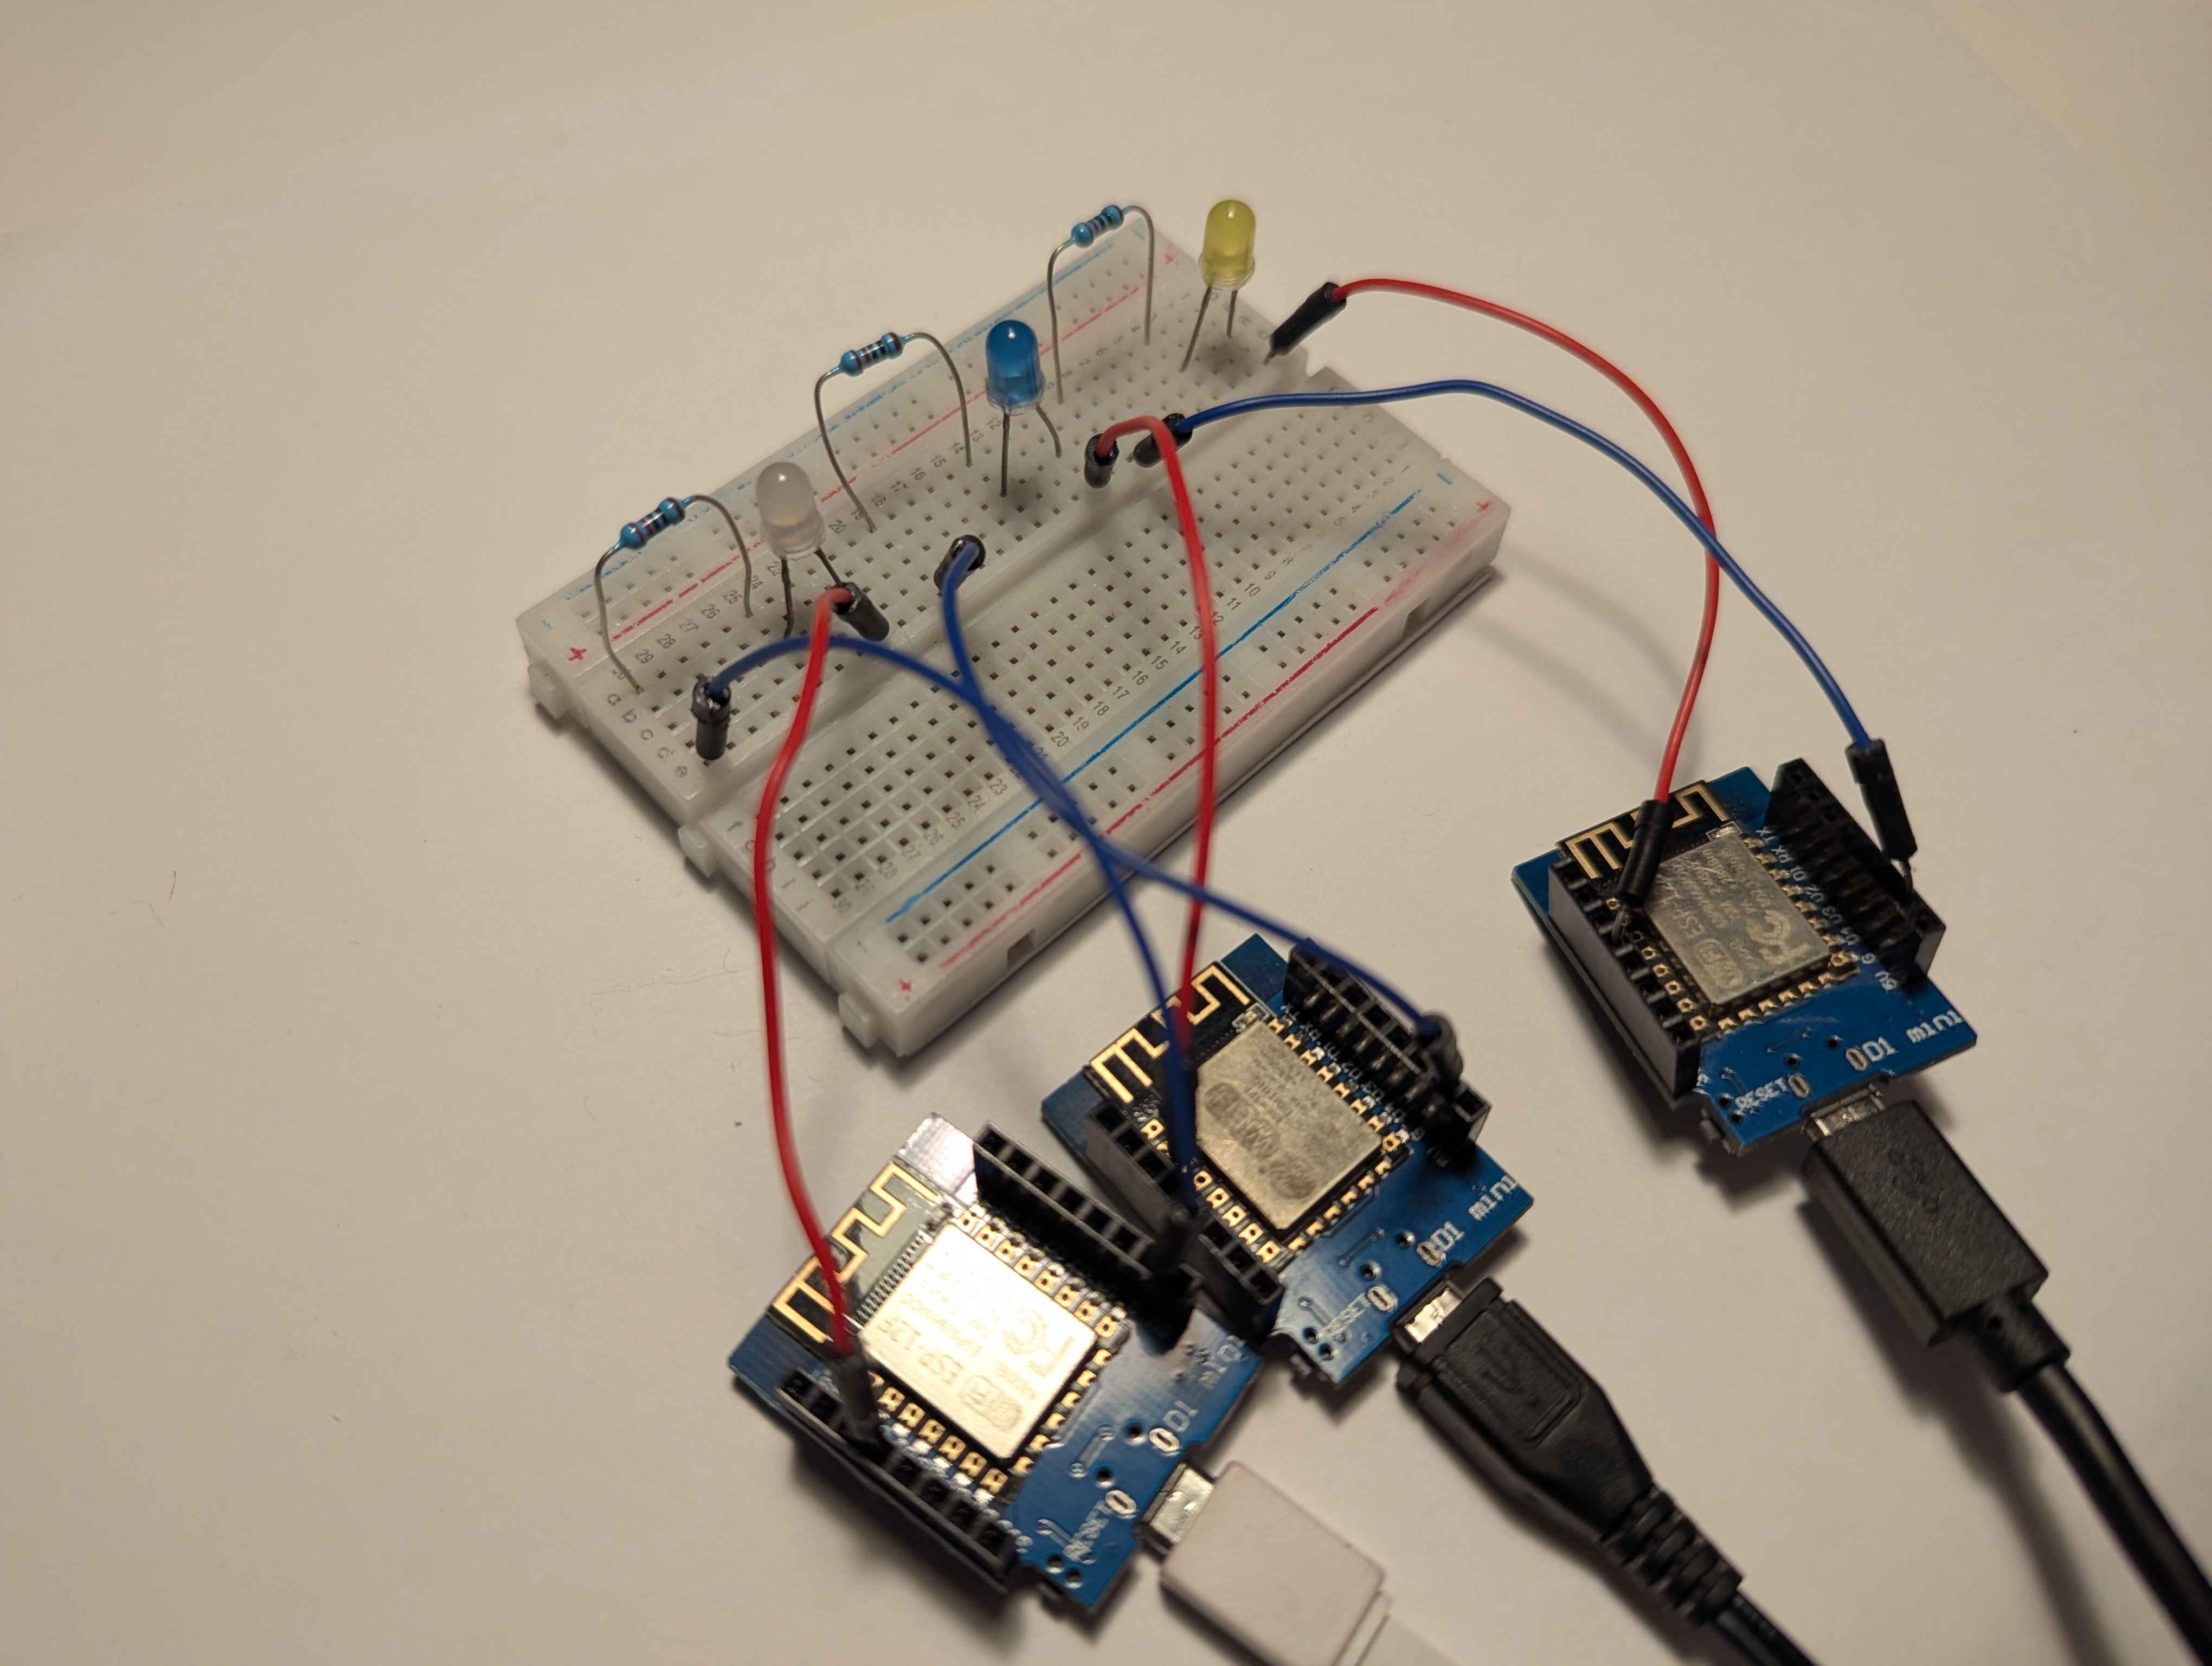
Each edge device exposes a very simple little API just to toggle its state from OFF to ON and vice versa:
server.on("/device/toggle", HTTP_POST, [](AsyncWebServerRequest *request) {
if (state) {
    digitalWrite(ledPin, LOW);
    request->send(200, "application/json", "{\"state\":\"off\"}");
} else {
    digitalWrite(ledPin, HIGH);
    request->send(200, "application/json", "{\"state\":\"on\"}");
}
state = !state;
});
There’s also an endpoint for checking what the current state of the device is:
server.on("/device/state", HTTP_GET, [](AsyncWebServerRequest *request) {
request->send(200, "application/json", state ? "{\"state\":\"on\"}" : "{\"state\":\"off\"}");
});
Each device advertises a local domain name for itself, and then sits idle waiting to receive API requests:
void loop() {
  MDNS.update();
}
Processing Unit Link to heading
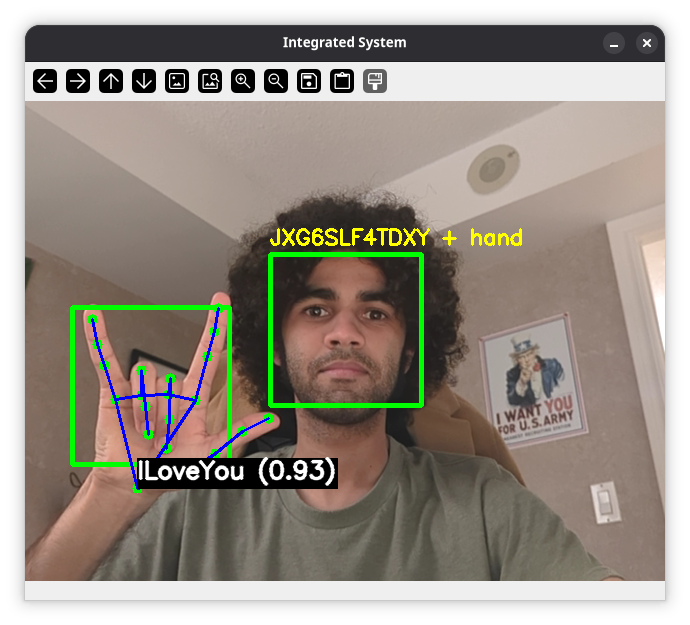
The Processing Unit is the part that does all the computer vision related stuff that I mentioned previously (biometric authentication and hand gesture resoltion). It is constantly analysing a video feed to see if there are any new people, and if they are registered in the system. If they’re not, it doesn’t check for hand gestures.
This module of the Handy Automator is a bit heavy in terms of processing, so it needs to run on hardware that’s at least a little bit powerful.
Mobile App Link to heading
This module is where the user can configure everything on the system. They may also use the app to trigger workflows without having to use gestures, should they be away from the camera or just want more deterministic control over a workflow.
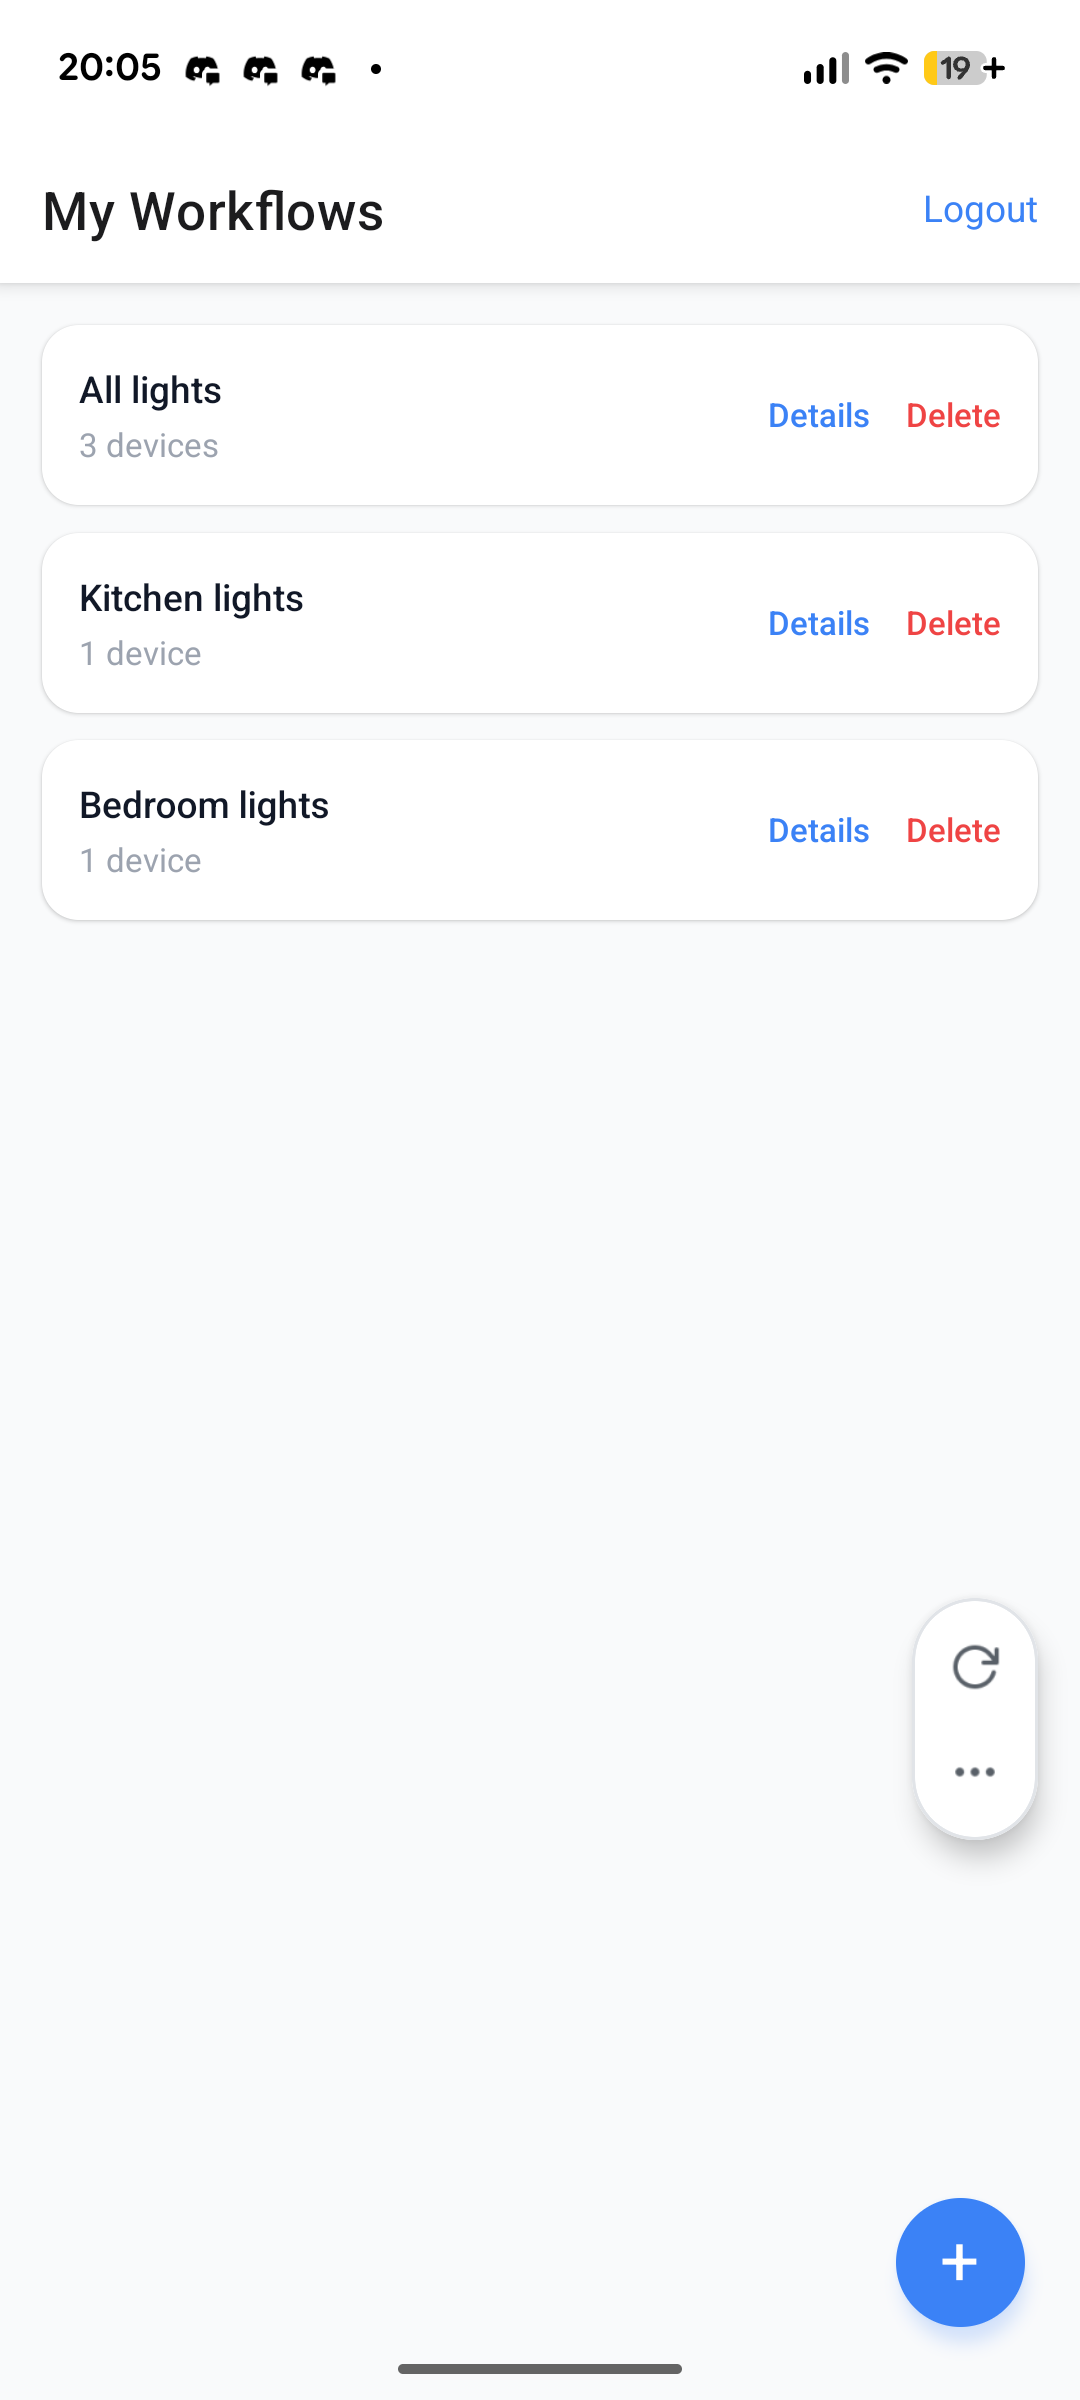
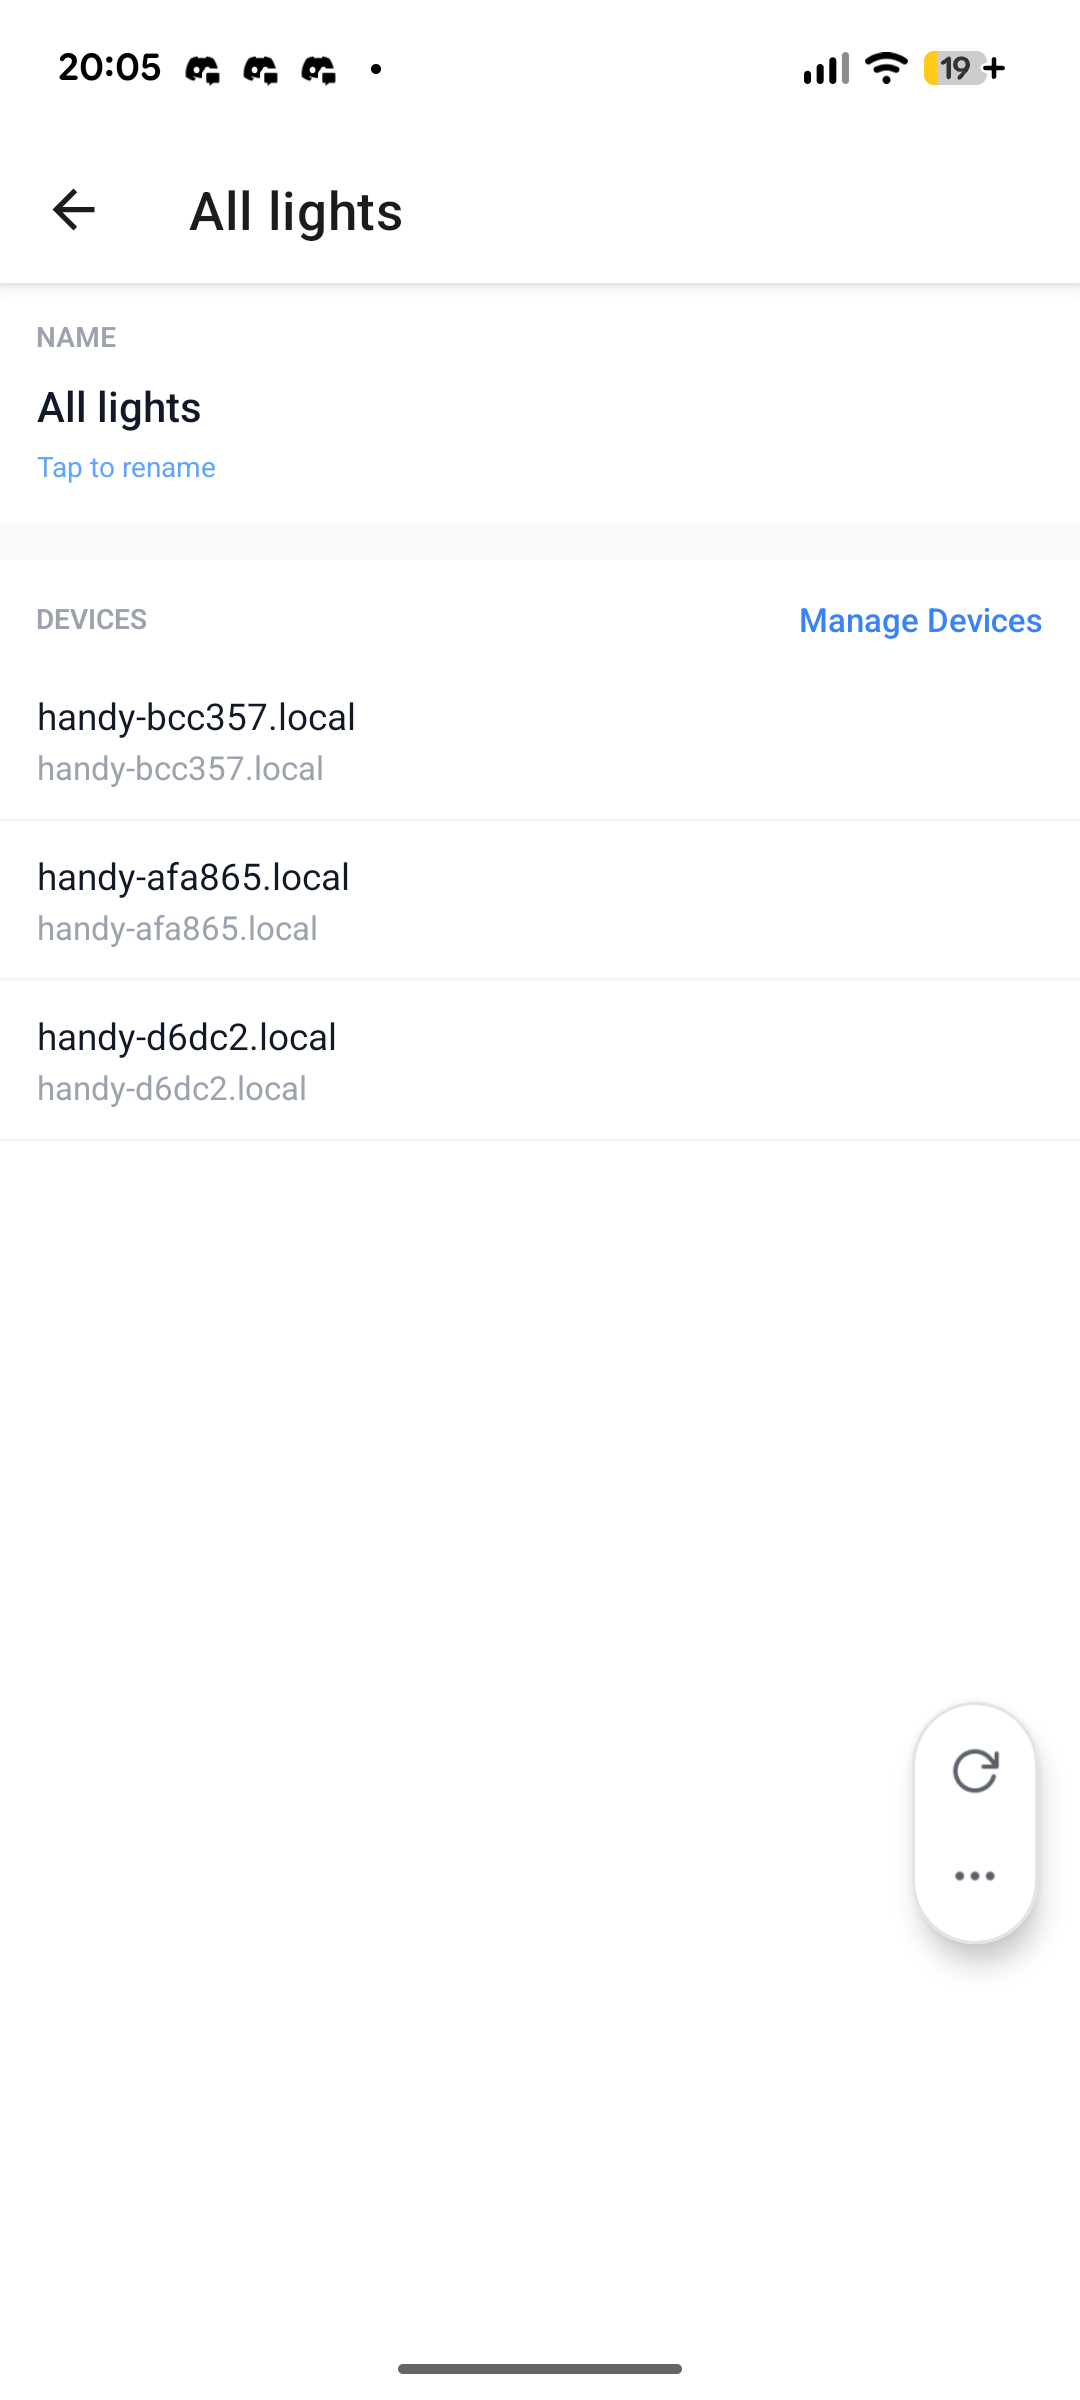

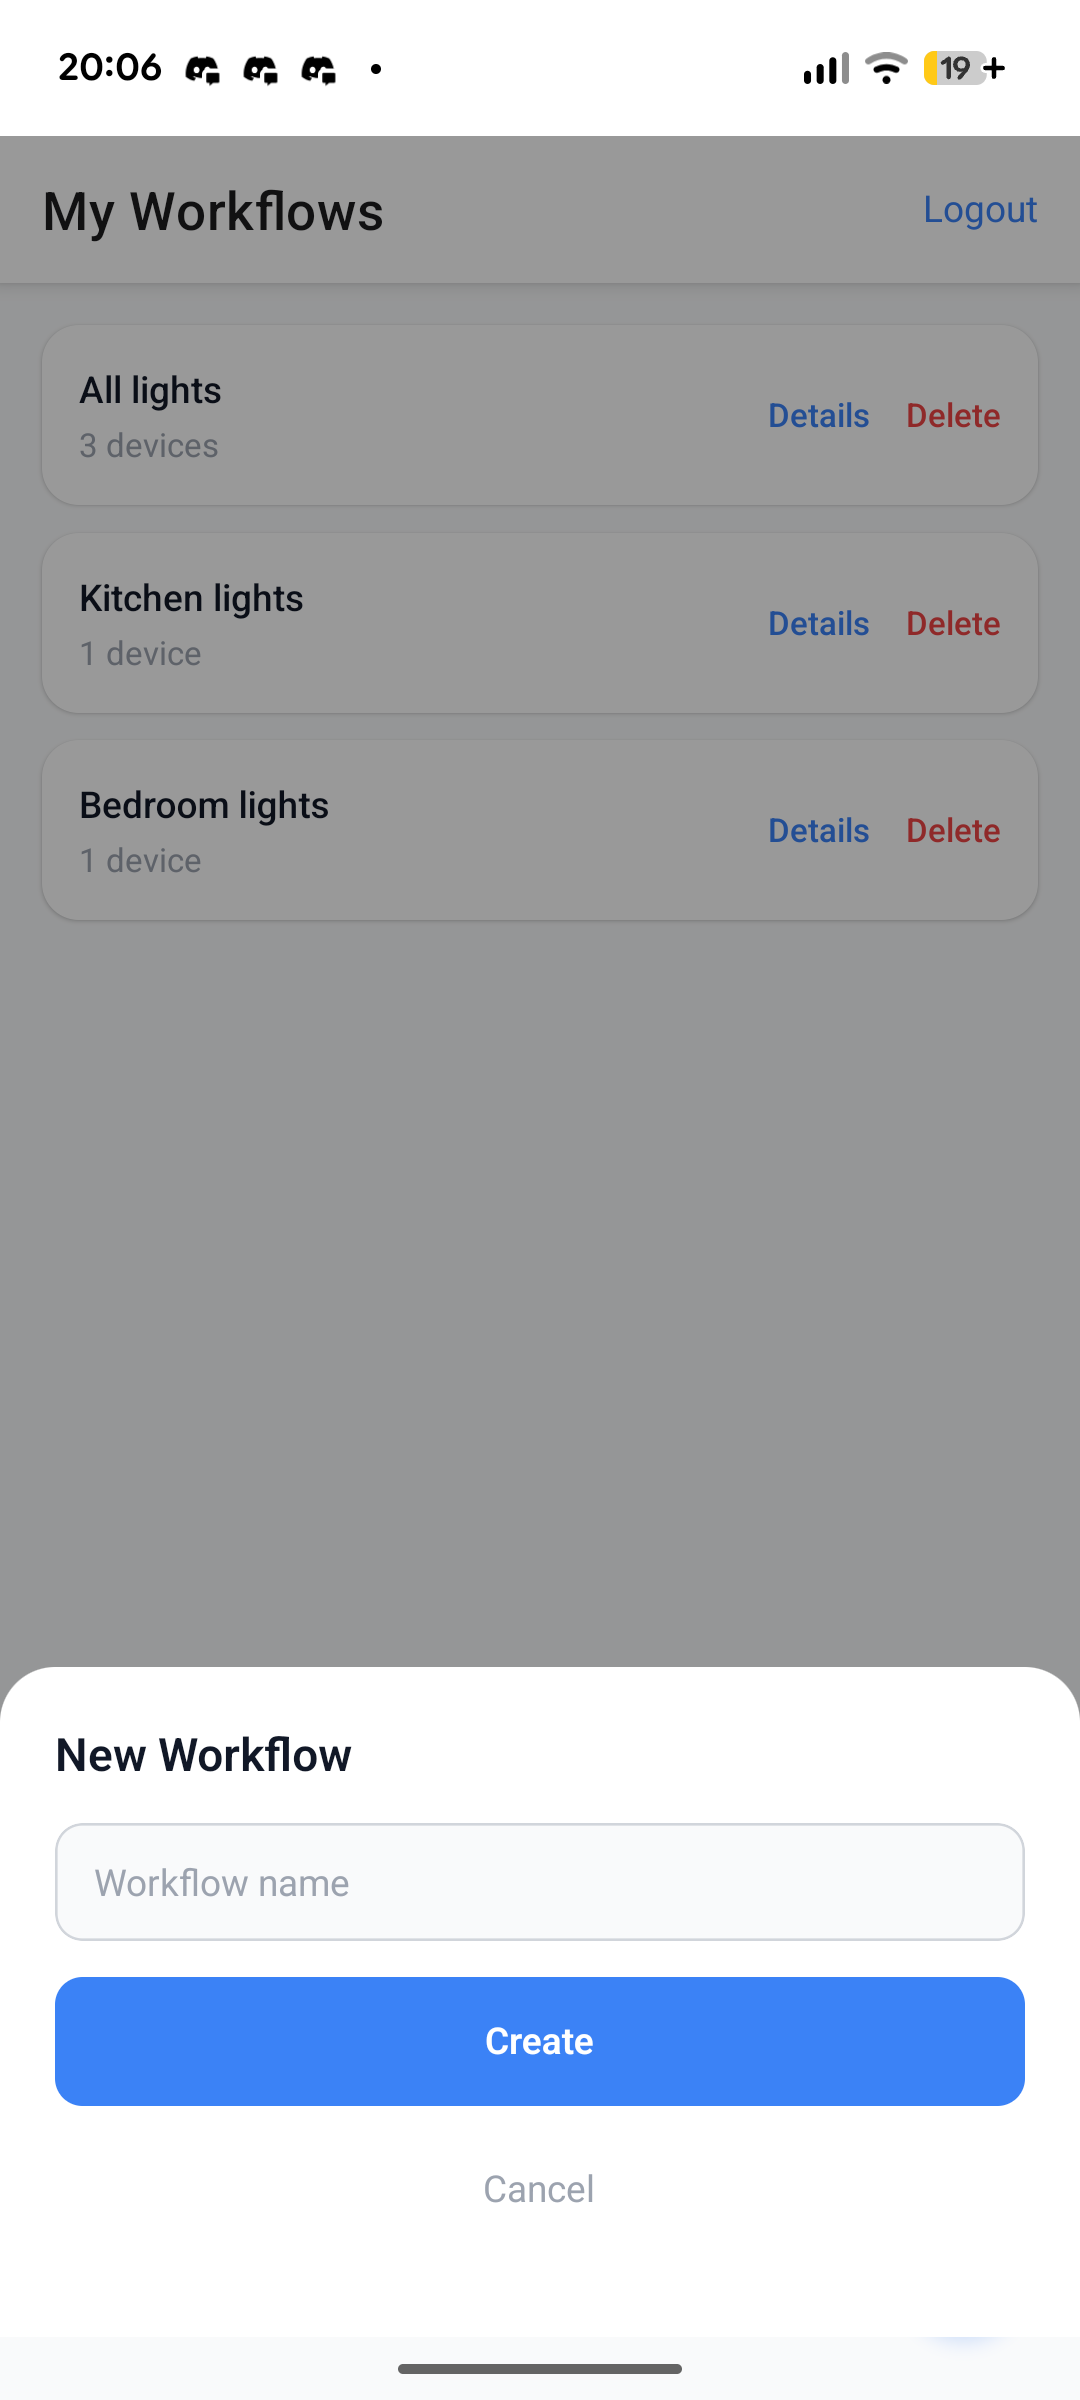
The app uses the most endpoints out of all modules. It needs to authenticate, perform CRUD on mutiple types of records, and trigger automations.
Nothing particularly interesting about authentication here. We decided to use an access/refresh token pattern, wherein access tokens can, well, access the system. But once an access token expires the client can use a refresh token to request a new access token. If the refresh token expires as well, then the client has to login again.
Decision Maker Link to heading
The DM is the central hub of the system. It manages the whole orchestration of which devices should be toggled ON/OFF given a user and a “workflow” ID.

On the above sequence diagram, you can see what happens under the hood when a user logs-in and triggers an automation. The DM concurrently toggles all the devices associated with the workflow ID specified. It then returns a list of HTTP statuses from the edge devices.
The API for the Decision Maker was implemented declaratively first, via an OpenAPI specification file. We then used a code generation tool, to generate Go interfaces based on the API specification. Finally, we strictly implemented those interfaces such that their functionality aligned with the documentation.
From yaml:
paths:
    /workflow/trigger:
        $ref: paths/workflow_trigger.yml
To Go interfaces:
// StrictServerInterface represents all server handlers.
type StrictServerInterface interface {
	TriggerWorkflow(ctx context.Context, request TriggerWorkflowRequestObject) (TriggerWorkflowResponseObject, error)
}
And finally into concrete implementations:
func (s Server) TriggerWorkflow(ctx context.Context, request TriggerWorkflowRequestObject) (TriggerWorkflowResponseObject, error) {
	statuses, err := s.workflowService.Trigger(ctx, request.Body.GestureId)
	if err != nil {
		if errors.Is(err, persistence.ErrNotFound) {
			return TriggerWorkflow404JSONResponse{Message: "workflow not found for this gesture"}, nil
		}
		refCode := logWithRef(err, "TriggerWorkflow")
		return TriggerWorkflow500JSONResponse{
			Message: internalErrorMessage,
			Ref:     refCode,
		}, nil
	}

	resp := make(TriggerWorkflow207JSONResponse, len(statuses))
	for i, s := range statuses {
		resp[i].DeviceId = s.DeviceId
		resp[i].Ok = s.Ok
		if !s.Ok {
			resp[i].Error = &s.Error
		}
	}
	return resp, nil
}
Other Neat Things Link to heading
With every semester here at George Brown, I focus my attention on one overall theme. This semester, that theme was developer experience.
I did my absolute best to keep the development environments as simple to setup as possible.
In the Handy Automator, I chose Make as our task running tool and created a Makefile with targets like this:
help: ##@Miscellaneous Show this help message
	@uv run ./scripts/help.py
.PHONY: help

dm: ##@Development Start the decision-maker in development mode
	@cd ./decision-maker && go tool reflex --decoration=none --config=./reflex.conf
.PHONY: dm

pu: ##@Development Start the processing-unit in development mode
	@cd ./processing-unit && uv run main.py
.PHONY: pu

test-pu: ##@Development Run the processing-unit test suite
	@cd ./processing-unit && uv run python ./test_suite/test.py
.PHONY: test-pu

gen-api: lint-api ##@Development Generate API code from the OpenAPI spec
	@$(TOOL) go generate ./api/...
.PHONY: gen-api

lint-api: ##@Development Lint OpenAPI spec
	@docker compose run --rm --workdir /api tool redocly lint /api/openapi.yml # can't use $(TOOL) cause I need to specify the workdir
.PHONY: lint-api
One thing you may have noticed, are these strange looking comments beside every
target. I actually borrowed this idea from
Navidrome’s development environment.
You see, these comments get parsed by an
external script.
When the developer runs make help, a nice help menu is displayed on their
terminal:
Usage: make [TARGET]

Database:
  start-db            Instantiate a database container
  stop-db             Stop the database container
  destroy-db          Stop the database container and erase all its data
  seed-db             Seed the database with sample data
  mup                 Apply all migrations
  mdown               Undo the last migration
  migration           Create a new migration SQL file in db/migrations

Development:
  dm                  Start the decision-maker in development mode
  pu                  Start the processing-unit in development mode
  test-pu             Run the processing-unit test suite
  gen-api             Generate API code from the OpenAPI spec
  lint-api            Lint OpenAPI spec

Miscellaneous:
  help                Show this help message
  check-db-status     Check if the database is ready to accept connections (internal)
The database is containerized, and so are the migration and API generator tools. So everyone can run those targets without needing to install additional tools, or even worse, installing a full database on their local computers just for a single project.
Now unfortunately, I couldn’t containerize the Processing Unit or Decision Maker modules due to their design. I guess maybe it’s something to keep in mind for next time….